After I showed Laura a pattern for a diminutive kimono-display quilt, she wanted one. I made this one for her as a graduation gift.
.JPG)
Since that time, I have been collecting fabrics with Geisha designs and rich colors. Here's a photo of the quilt I made. To me, it looks like kimonos placed into a "Hollywood Squares" background. Anyway, if anyone's interested, here are the instructions for folding the kimonos.
Kimono Folding Instructions
To make these kimonos, the folds should be made using an iron set to the highest setting for your fabric. I use a Rowenta steamer iron, which I love!
Here’s a photo of my Rowenta

1) With the wrong side of a 3-3/4 inch x 12-1/2 inch print rectangle facing up, make a single ¼-inch fold down each long edge and a double ¼-inch fold along the top edge.
2) Turn piece over so the right side is facing up and fold the two top corners over to the right side so that they meet in the center to form the collar as shown in photo 1.
 Photo 1
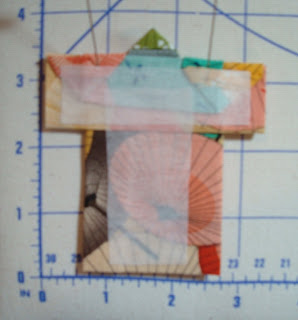
3) Using photo 2 as a guide, fold the piece into three so that there is a ¼-inch space between the top fold and the point—the first fold and the lower edge should be aligned.
 Photo 2
4) Fold in all the layers on both long edges so that they lie parallel with the edge of the collar, as shown in photo 3.
 Photo 3
5) Fold back the top layers of the fabric on both edges and press them to form triangles as shown in photo 4, and then turn the piece over.
 Photo 4
6) Fold the top section down along the base line of the triangles, so that the collar section protrudes above the fold line.
7) On the back, open up the previous fold, then double-fold the top layer of fabric upwards so that the raw edge is tucked inside and lies along the lower fold—the top fold should be in line with the previous fold line. Refold the previous fold back down over itself to hold them in place. See photo 5.
 Photo 5
8) Following manufacturer’s instructions, fuse two 1-inch x 2-1/2-inch pieces of interfacing to the back of the kimono, with one piece across the top sleeve section and the other down the length of the body. These fused pieces should hold the folds in place.
 Fused on back
After I made two more kimonos, I placed them into a shadowbox frame I purchased for $3 at a yard sale. The frame had enclosed a fake braided string of garlic. I hung the unframed garlic string in my kitchen. I lined the background of the frame in deep blue fabric that created a rich background for the printed kimono fabrics.
 My finished project

2 comments:
ooo, my goodness..what a work of art. You are so talented and I can see your little daughter is following right in your footsteps. Her work is fabulous and I can see why you are so proud. I would be, too!
love, bj
Those kimonos are just beautiful and the fabrics are just beautiful.
Gretcen
Post a Comment